

Ankle Sprains
Paediatric Management Advice
What is a sprained ankle?
Ankle sprains occur when the ligaments around the foot and ankle are overstretched during an injury such as sudden twisting, which may cause some fibres to tear. The severity of the sprain will differ depending on how much stretch has occurred.
What are the symptoms of a sprain?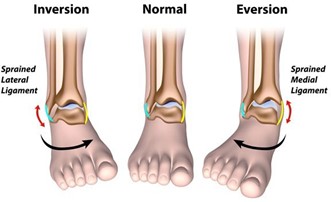
- Pain around the joint
- Swelling
- Bruising
- Pain when walking or moving
Pain relief
Consult your GP or local pharmacist for advice as to which medication is suitable for your child to take.
Important signs and symptoms to look out for:
If your child experiences any of the following symptoms, please seek further urgent medical advice:
- Worsening swelling or bruising not improved by elevation or rest.
- Worsening, severe pain in the foot and ankle.
- Regular or constant night pain.
- Loss of sensation or persistent pins and needles / numbness in the foot / ankle / toes.
- Abnormal weakness in the foot i.e. foot drop.
- Altered colour or unusual sweating of the foot / ankle.
- Constant giving way or unable to weight bear through the foot / ankle.
- Ankle pain with hip or knee pain.
- Pain that does not settle with rest or reduction of activity.
- Increased temperature or feeling hot and shivery may indicate an infection.
Only continue to read if you have none of the above symptoms
Recovery and Rehabilitation
Healing times
- Ankle sprains will usually heal within 6-8 weeks. Swelling and bruising may still be present for up to 10 days.
- Normal activity levels are usually restored after 6-8 weeks. The risk of re-injury is higher in the first 4-6 weeks. We would advise you do not return to full sporting activities until your pain level has returned to normal and you can balance on one leg.
- As your child completes the exercises provided they may notice some swelling and aching. This is normal. We advise you should follow the RICE guidance after doing exercises. Do not apply ice if your child has circulatory problems or reduced skin sensation.
- There is no need to stop moving, walking or doing some gentle activities unless it is causing significant pain.
Initial Management
If your child has sprained their ankle, you can care for them at home using first aid principles (the Rest, Ice, Compression, Elevation (RICE) strategy) and ankle exercises. Treatment should start immediately and continue for the next 2 to 3 days.
- Rest - rest the injured ankle and initially avoid activities that cause a lot of pain. Ice - apply ice to the injured area for 10 to 15 minutes wrapped in a towel (be cautious of ice burns).
- Ice the injury every 2 to 4 hours for 2 to 3 days when your child is awake.
- Compression - use a firm bandage that is not too tight and does not stop circulation or cause extra pain. The bandage should cover from just above the ankle right down to the foot. Do not cover the toes. This should be worn for 2 to 3 days when your child is awake.
- Elevation - raise the ankle whenever possible to help reduce the swelling. For example, raise your child’s injured leg and rest it on some pillows while they are watching TV, reading, or resting.
What is the Physiotherapy Management?
- It is important to keep your child’s ankle moving even when painful. Evidence has shown that walking and completing basic exercises helps the sprained ligaments to heal. Try to get your child to walk as normally as possible, putting their heel down first and pushing off through their toes.
- In most cases your child will not need to be seen by a Physiotherapist for rehabilitation. Following the below exercises and retraining your balance will help with recovery from an ankle sprain.
- If the exercises fail to work and you are still experiencing problems 6-8 weeks post injury, please contact the Paediatric Physiotherapy service on the number provided to book an assessment.
Exercises — Phase 1 — Movement
Completing the below exercises will help maintain range of movement and reduce swelling. Try to complete the exercises 3-4 times per day and walk normally as pain allows.
Ankle rotations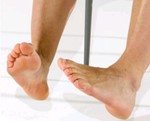
In sitting or lying, slowly rotate your feet in a circular motion. Repeat 5-10 times.
Dorsiflexion and plantar flexion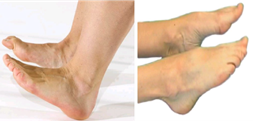
In sitting or lying, slowly move your ankles up towards the ceiling and lower them back down to point towards the floor. Repeat 10-15 times.
Eversion and Inversion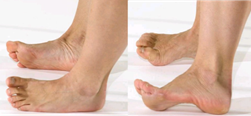
In sitting or lying, turn your feet outwards and then inwards. Repeat 10-15 times.
Exercises — Phase 2 — Strengthening
Once you can complete phase 1 comfortably, progress to phase 2.
Seated heel raise 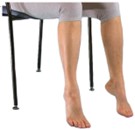
Sit with your knees hip distance apart and feet flat on the floor. Slowly push through your toes lift your heels off the floor before lowering back down. Repeat 10-15 times.
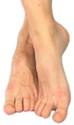 Seated isometric eversion
Sit on a chair or on the floor. Cross your feet and put the outer edge of your little toes together. Press the outer edges of your little toes together. Hold for 20 seconds. Repeat 3 times.
Seated isometric dorsiflexion 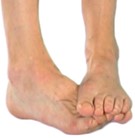
Sit on a chair. Put one foot on top of the other foot. Try to lift the foot that is underneath while preventing any movement with the foot that is on top. Hold for 20 seconds. Repeat 3 times.
Exercises — Phase 3 — Progressive strengthening
Once you can complete the exercises in phase 2 comfortably, progress to phase 3.
Standing heel raise with support 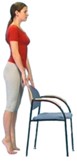
Stand holding onto a support with your feet hip distance apart, feet and knees facing forward. Push through your toes and slowly lift your heels off the floor. Hold for 5 seconds before bringing them slowly back down. Repeat 10-15 times.
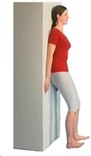 Toe raises against a wall
Lean against a wall with your feet hip distance apart and slightly in front of the wall. Slowly lift your toes up towards the ceiling and hold for 5 seconds. Repeat 10 times. You can make this harder by completing it on one leg.
Single leg balance 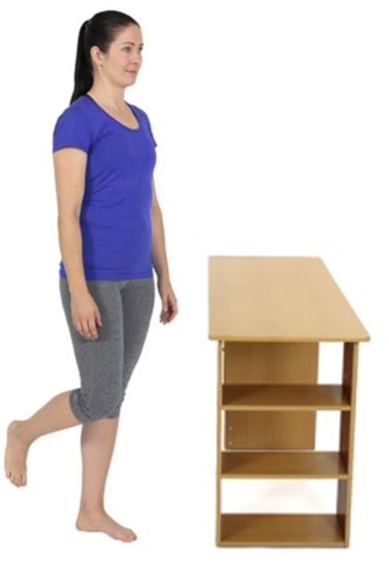
Standing next to a support, slowly lift one leg in the air and try to keep your balance for as long as possible. Aim for 60 seconds. Repeat 3 times on your injured leg.
Exercises — Phase 4 — Single leg strength and balance
Once you are able to complete the exercises in phase 3 comfortably, move on to phase 4. To help prevent further injuries, it is important to work on single leg strength and balance.
Standing single leg heel raise with support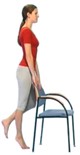
Stand holding onto a support with your feet hip distance apart with your foot facing forward. Slowly lift your heel off the ground whilst holding the other foot in the air. Hold for 10 seconds and repeat 3 times.
 Star balance
Standing on your injured leg, maintain your balance whilst reaching out with your other leg forwards, to the left, right and backwards. Repeat 3 times.
If you need any further information or you feel that you need further intervention please contact the Paediatric Physiotherapy department on 01282 803587 or email paeds.physiotherapy@elht.nhs.uk